
Interactive Game Room Installation: From Order to Opening Day
Interactive game room installation is usually the next major question after the equipment order is confirmed — not before it. Once the final configuration, layout and payment terms are agreed, the focus shifts from product selection to project delivery:
- How long will production take?
- When can the equipment ship?
- What has to be ready at the venue?
- How long does installation and commissioning take?
- And most importantly — when can the venue open?
The answer depends on how well production, shipping, site preparation and installation are coordinated. Operators who understand this sequence in advance can set a realistic opening date and prepare their venue correctly. Operators who don’t often end up explaining to landlords, staff, or marketing partners why an opening date has slipped by several weeks.
This guide is written for FEC owners, entertainment venue operators, distributors, and project planners who are preparing a commercial interactive game room installation. It walks through what happens after an order is placed — from production through opening day — and what to do at each stage to keep the project on track.
What Happens After You Place an Interactive Game Room Order
Most interactive game room installation projects follow a similar sequence: order confirmation, final layout and configuration, production, pre-shipment testing, packing and shipping, customs and local delivery, site preparation, installation, commissioning and game testing, staff training, and opening.
Production and Final Configuration
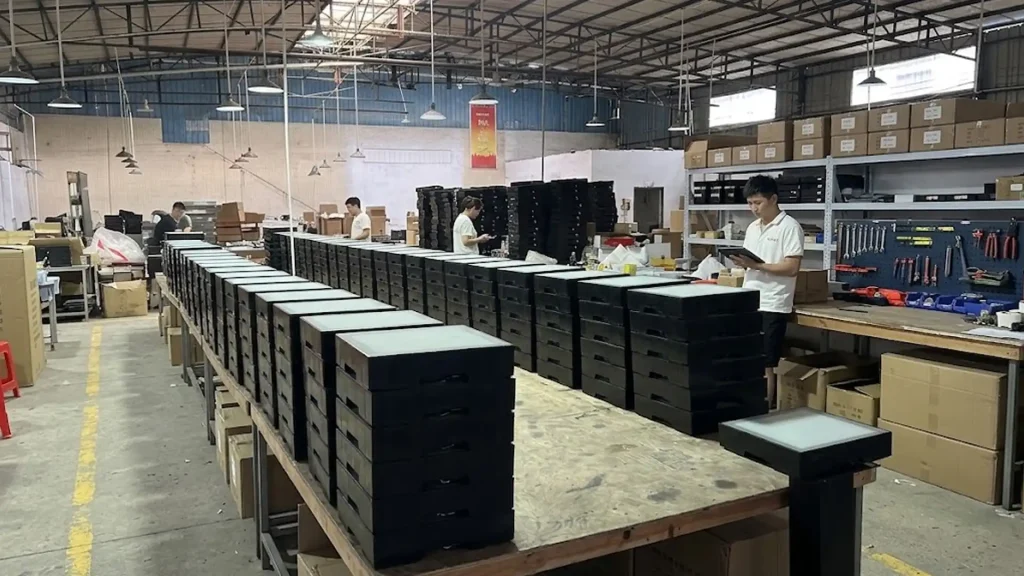
Production begins once payment terms are confirmed and the final specification is locked — tile quantity, room layout, and any custom configuration including OEM branding, game mode selections, or interface language. Request a specific production timeline from your supplier rather than a general estimate, since lead time varies between standard and customized configurations.
Pre-Shipment Testing
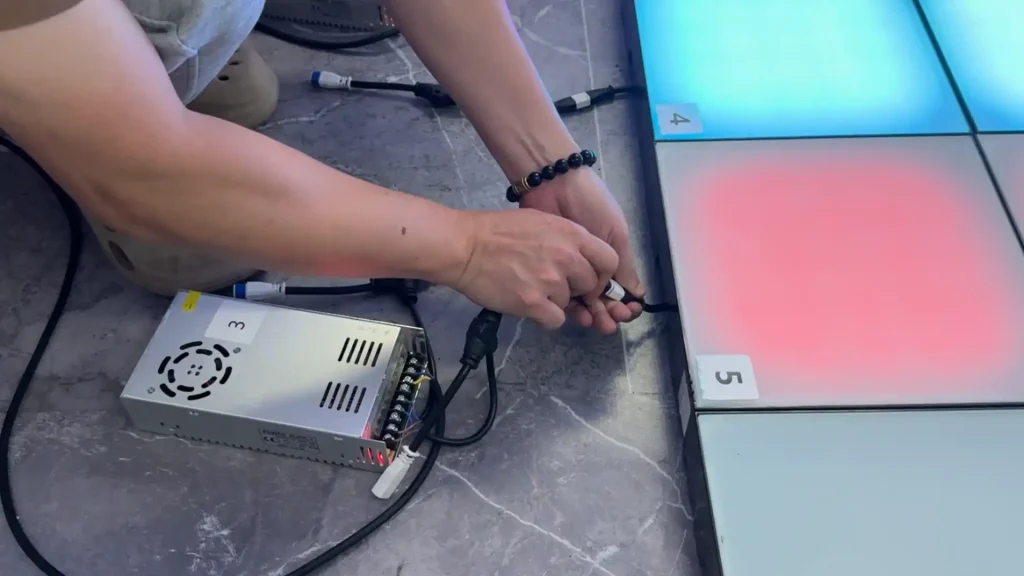
Before equipment leaves the factory, a reliable supplier completes a full pre-shipment test — powering on every unit, verifying sensor response across the system, and confirming that configured game modes run correctly under multiplayer conditions. Catching a defective component before shipping takes hours to resolve. Discovering the same issue after delivery, when a replacement has to be shipped separately, can delay opening by weeks.
Who Is Responsible for Each Stage?
Most installation delays don’t come from any single failure — they come from supplier and operator assuming different scopes. Confirming responsibility in writing before production begins prevents this.
| Project Stage | Supplier | Customer / Venue | Common Delay Risk |
|---|---|---|---|
| Final configuration | Confirm equipment configuration and technical requirements | Approve layout and final specifications | Late changes after production starts |
| Production | Manufacture and prepare equipment | Confirm order details | Delayed approvals |
| Pre-shipment testing | Test hardware, sensors and software | Review test information if required | Issues discovered too late |
| Shipping preparation | Packing and export documents | Confirm delivery and import information | Incorrect or mismatched documents |
| International shipping | Arrange according to agreed Incoterms | Coordinate with freight forwarder if required | Shipping delays |
| Customs clearance | Provide required shipping documents | Arrange local customs clearance and taxes where applicable | Missing documents |
| Site preparation | Provide installation requirements and diagrams | Prepare floor, power, access and network | Venue not ready |
| Installation | Provide installation support as agreed in the purchase agreement | Provide site access and local coordination | Unclear responsibility |
| Commissioning | Test and configure the system | Provide staff and operational feedback | Opening scheduled too early |
| Training and handover | Provide training and documentation as specified in the project scope | Assign trained staff | Staff not prepared |
Shipping, Customs and Local Delivery: What Can Affect Your Opening Date
Shipping is typically the longest single stage in an interactive game room installation, and the one operators have the least direct control over.
Sea Freight vs Air Freight
Full systems are bulky and heavy — sea freight is the standard method because the cost difference versus air freight is significant at this cargo volume. The tradeoff is transit time, measured in weeks rather than days. Air freight is occasionally used for urgent replacement parts or smaller accessory orders where speed justifies the cost.
LCL vs FCL
Smaller orders may ship as LCL (Less than Container Load), consolidated with other cargo. Larger system orders typically move as FCL (Full Container Load), which gives more control over the timeline and reduces the risk of cargo damage from handling. Ask your supplier which method applies to your order size.
Incoterms and Responsibility
The Incoterms in your purchase agreement — EXW, FOB, CIF, DDP — determine where the supplier’s responsibility ends and the buyer’s begins. Understanding this before signing affects who arranges customs clearance, who pays freight insurance, and who is responsible if equipment is delayed or damaged in transit.
Customs Clearance
Clearance depends on the destination country’s import requirements. A complete document package from the supplier is essential — commercial invoice, packing list, certificate of origin, and equipment certification documents are the most commonly required across markets. Confirming local requirements with your own customs broker or freight forwarder before the container ships, not after it arrives at port, is the single most effective way to prevent clearance delays.
Local Delivery and Unloading
Arrival at port isn’t the end of the shipping stage. Confirm the plan for local trucking from port to venue, unloading equipment (forklift or manual, depending on packaging), and any constraints at the venue itself — loading dock availability, door width, elevator access, or corridor clearance for larger crates. Equipment that reaches the country on schedule can still sit in temporary storage if this last stretch isn’t planned.
The most common customs delay is not the equipment itself but documentation mismatches — an invoice that doesn’t correspond to the packing list, or missing electrical certification required by the destination country. These are preventable with earlier preparation.
How to Prepare Your Venue Before Installation
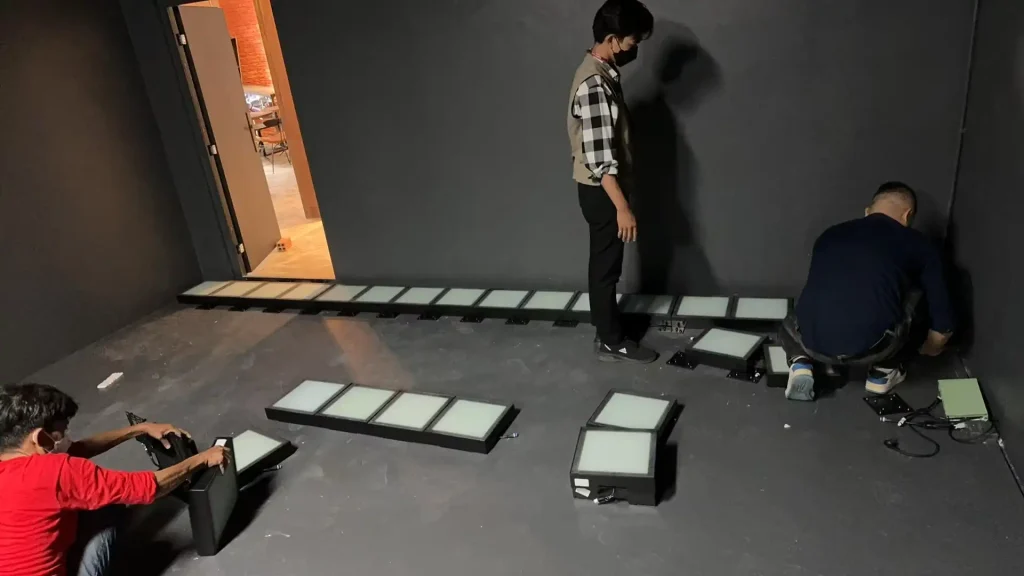
Venue readiness is where operators have the most control over the installation timeline — and where avoidable delays occur most often.
Floor Surface
The subfloor must be level, clean, and structurally sound before installation begins. Confirm the surface tolerance with your supplier against the specific system being installed. An unlevel floor affects alignment, visual appearance, and long-term sensor performance.
Power Supply
Confirm electrical capacity against the system’s total power draw, with dedicated circuits and outlets positioned according to the installation diagram provided by the supplier. Electrical work that isn’t complete when the installation team arrives forces a reschedule — one of the most common and most preventable causes of delay.
Ventilation and Temperature
LED and control systems generate heat under continuous operation. Confirm that the venue’s ventilation is adequate for the system’s operational load, particularly in enclosed rooms.
Controller and Network Position
Decide where the main controller, network connection, and any display or audio equipment will sit before installation day. This affects cable routing, staff access for day-to-day operation, and future maintenance. Confirming this early avoids reworking wiring on-site.
Access and Staging Space
Installation teams need clear access to bring equipment into the venue and staging space nearby to organize components before installation. This matters more than operators typically expect for larger systems with many individual units.
Layout Confirmation
The final room layout should be confirmed against the supplier’s installation diagram before installation day, not during it. Any layout changes discovered on-site add time and may require additional materials. See our interactive gaming room layout guide for how room positioning and player flow should be finalized before installation begins.
See the pre-installation checklist below for a quick confirmation list before booking an installation date.
On-Site Installation and Commissioning
The physical installation process depends on the equipment included in the project. For modular interactive floor systems, installation typically involves positioning, system connections, controller setup, and sensor calibration. Other attractions in a game room may have their own mounting, power, and commissioning requirements. Always follow the installation documentation provided for your exact configuration.
For a detailed walkthrough of our modular interactive game floor installation, watch the installation tutorial.
System Power-On and Calibration
Once equipment is physically in place and connected, the system powers on and sensor calibration runs across the full setup, verifying that everything is responding correctly and ready for game mode testing.
Game Mode Verification
Each configured game mode is tested under actual gameplay conditions, including multiplayer sessions. This is where edge cases surface — a game mode that doesn’t trigger correctly with multiple players active, or a section that responds slightly slower than the rest of the system. These are resolved during installation, not after opening.
Load Testing and Staff Training
The final stage before handover is a load test simulating the actual number of simultaneous players the venue expects at peak hours. Staff training then covers day-to-day operation, session management, the wristband or IC card start system, and — as covered in our active gaming room safety guide — emergency stop procedures that staff need to be confident in before opening.
Checklists
Delivery and Arrival Checklist
- Check package quantity against the packing list
- Inspect visible shipping damage
- Confirm all main components are present
- Photograph any damaged packaging before unpacking
- Confirm the delivery route into the venue is clear
- Prepare a staging area
- Keep spare parts and documentation organized
Pre-Installation Checklist
Confirm before scheduling installation:
- Floor surface level and clean within supplier tolerance
- Electrical circuits installed with outlets at specified positions
- Ventilation confirmed adequate for system heat output
- Venue access clear for equipment delivery and staging
- Final layout diagram confirmed and approved
- Customs documents complete and clearance confirmed
- Staff training session scheduled
- Local contractors and any required storage space arranged
Opening Day Checklist
Confirm before first paid session:
- All equipment powered on and sensor response verified
- All game modes tested under multiplayer conditions
- Emergency stop procedure tested and confirmed functional
- Leaderboard and scoring display operational
- Staff briefed on session management and rotation procedures
- Backup component available on-site for immediate replacement if needed
- Cleaning and maintenance procedure documented for staff
Common Installation Delays — and How to Avoid Them
| Common Delay | Why It Happens | How to Reduce the Risk |
|---|---|---|
| Venue not ready | Electrical or flooring work incomplete when installation is scheduled | Confirm readiness against the checklist before booking a date |
| Customs delay | Missing or mismatched documents | Confirm requirements with a customs broker before the container ships |
| Specification changes | Layout or configuration changed after production began | Lock the specification before payment confirmation |
| Unclear installation responsibility | Supplier and operator assume different scopes | Document responsibilities in writing before signing |
| Damaged or missing components | Packing or handling issues in transit | Confirm inspection process and spare-parts policy in advance |
| Opening date announced too early | Marketing or lease commitments set before key stages are confirmed | Confirm production, shipping and site readiness before committing to a public date |
Questions to Confirm Before Scheduling Installation
A supplier who is confident in their process should answer these specifically, not with general assurances.
About Timeline
What is the estimated timeline from payment confirmation to installation completion, broken down by stage? How much of that is production, shipping, and on-site work?
About Installation Method
Do you provide on-site installation, remote-guided installation, or both? If remote-guided, what does that include — video call support, written documentation, or both? Is there a dedicated installation diagram specific to my layout?
About Problems During Transit
What happens if equipment arrives damaged or a component is missing? Is there a spare-parts policy, and what is the typical resolution timeline?
About Training and Handover
Is staff training included, and how is it delivered — on-site, remotely, or through documentation? What ongoing technical support is available after installation is complete?
For the broader framework on evaluating suppliers before reaching the installation stage, see our active gaming room supplier guide.
From Order to Opening Day
An interactive game room installation timeline is rarely just about equipment. It’s about how well production, shipping, venue preparation, and on-site setup are coordinated — and coordination problems are almost always more expensive than equipment problems.
Operators who ask detailed timeline and process questions before signing consistently have smoother installations than those who assume the process will manage itself. The gap between those two outcomes is usually a handful of questions asked two or three weeks earlier.
If you already have a venue and target opening date, send us your floor plan or room dimensions, venue location, target opening date, equipment you plan to install, and whether you need remote-guided or on-site installation support. We can help review the project sequence and identify what’s needed before production and installation are scheduled.
Discuss your installation plan on WhatsApp · View our Interactive Game Floor product page · Read our active gaming room supplier guide · Read our active gaming room safety guide · For cost and quotation planning, see our Interactive Game Floor cost guide
Frequently Asked Questions
How long does interactive game room installation take from order to opening?
The full process — from payment confirmation through on-site installation completion — commonly spans several weeks to a few months, depending on order size, whether the configuration is standard or customized, and shipping distance to the destination country. Request a stage-by-stage timeline from your supplier based on your specific order rather than relying on general estimates.
Can an interactive game room be installed remotely, or does it require an on-site team?
Both options are typically available. Modular plug-and-play systems can often be installed without specialized technical staff, using installation diagrams, a step-by-step video guide, and remote video support. On-site installation teams are also available for operators who prefer dedicated support. The right choice depends on in-house technical capability and schedule requirements.
How long does on-site installation take?
Installation time depends on system size, configuration, site readiness, and installation method. A modular system may be assembled relatively quickly once the site is prepared, while a complete multi-attraction room requires additional time for positioning, system testing, and commissioning. Request a project-specific installation schedule from your supplier.
What should I prepare on-site before installation begins?
A level, clean floor surface matching the layout dimensions, electrical circuits and outlets positioned per the installation diagram, adequate ventilation for continuous operation, and clear venue access for equipment delivery and staging. Confirming these against the supplier’s readiness checklist before scheduling installation is the most effective way to avoid delays.
What happens if equipment arrives damaged or a component is missing?
Ask your supplier in advance how this is handled — response time, cost responsibility, spare-parts policy, and whether spare components are included with the original shipment. Confirm the specific warranty terms and replacement process in writing before ordering, since coverage can vary by product and market.
Is staff training included in the installation process?
Typically yes, as specified in the purchase agreement. Staff training covers day-to-day session management, the wristband or IC card start system, game mode operation, and emergency stop procedures. Training is delivered on-site or remotely depending on the installation method chosen, and written operational documentation is normally provided as part of the handover.